
Tuesday, October 20, 2009
New Layout!

Tuesday, September 22, 2009
Support
To snag click on it to make it actual size then just right click and save.
My New Obsession
Sunday, September 13, 2009
Trick or Treat
Template: HorsePlaysPasture #46
Tube: One of choice, I’m using Keith Garvey You can get his work from MPT, Please do not use his work if you do not have a license.
Mask: Supplied
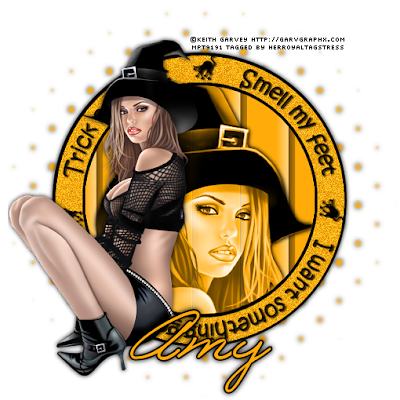
Open the template, duplicate and delete the original. Also delete the credits layer.
Make raster 3 the active layer. Selections, Select all, float, defloat.
Add a new layer and fill with a color to match your tube. Selections, Select none. Delete raster 3.
Apply a texture effect to your color layer if you would like.
Make the color layer active, selections, select all, float, defloat.
Copy and paste your tube. Mine came with a close up, so I used that. Position it to your liking. Selections invert delete.
Change blend mode to luminance. Apply a drop shadow.
Make raster 2 the active layer. Selections, Select all, float, defloat.
Add a new layer and fill with same color from above. Add Noise to this layer.
Delete Raster 2.
Make raster 1 the active layer. Apply a drop shadow.
I added a drop shadow of V&H 1, Opacity 100, blur 3 to the words and cats layer.
Copy and paste your tube and place it on your tag. Apply a drop shadow.
Add a new raster layer, put it above your background layer. Flood fill it with your color from above.
Apply Mask. Merge group. I added a drop shadow to my mask.
Add your copyright information and your name.
As always I would love to see your tags that you make using my tut.
Friday, August 7, 2009
Love Game
Tube of choice, I’m using the fabulous work of Keith Garvey, You can purchase his work at MPT. Please do not use his work if you do not have a license.
Love Game Kit by Gothic Inspirations Scraps it is a PTU kit
WSL mask 241 you can get it Here
Open new image 600 x 600 flood fill white.
Open Starl-GI_LoveGame, colorize it to match your tube. I used Hue 133 and Saturation 183. Copy and paste to your blank tag.
Using your magic wand select the inside of your star. Selections modify expand by 10.
Open paper 4 Copy and paste as a new layer under your star layer. Invert and Delete.
With your star still selected, copy and paste your tube. Position it to your liking and hit delete. Select None.
Duplicate your tube. On the duplicate apply a Gaussian blur of 25 then change the blend mode to overlay. Apply a drop shadow to the original.
Open Denim flower 1 copy and paste it below your star layer. Colorize using the same settings as before. Apply a drop shadow.
Open WordArtByJWs1 colorize using the same settings as before. Resize 70. Copy and paste to your tag. Apply a drop shadow.
Open paper 7 colorize using the same settings as before. Copy and paste to your tag. Apply WSL mask 241.
Add any other emblishment you would like.
If you are going to resize your tag, now is the time to do so.
Add all your copyright info and your name.
As always I would love to see your results.
Thursday, July 23, 2009
Blog Award
Saturday, July 18, 2009
Freedom to Thee PTU
Jai Ho Kit You can purchase it at Gothic Inspirations
Mask #1 by Me Download HERE
Open new image 600x600 Flood fill white.
Open Frame Mint 2 from kit. Copy and paste to your tag.
Using your magic wand select inside of the frame. Selections-modify-expand-5. Add new layer. Flood fill with #99B8B6. Move below your frame layer.
Keep Selected. Copy and paste your tube, mine came with a close up so that’s the one I used. Selections-invert-delete. Move below your frame layer. Selections-select none.
Change blend mode to luminance legacy.
Open the image lily and stem. Resize 90% copy and paste to your tag add a drop shadow. Duplicate Mirror.
Open word art Freedom to the. Resize 75% Copy and paste to your tag. Add a drop shadow.
Add a new layer just above your white layer. Flood fill with #99B8B6.
Open your mask and apply. Make sure you Merge group.
If you would like to resize now is the time to do so.
Add your name and all of your copyright information.
As always I would love to see your results.
Saturday, July 4, 2009
Summer Bliss
This Tutorial was written for those that have a working knowlege of PSP.
Template #7 from Cupcake Sprinkles
Summer Bliss Scrap kit from Gothic Inspirations, you can buy it HERE
Open template, duplicate it and close out the original. Delete the copyright layers. Change canvas size to 600X600, you can crop it later.
Make the Grey circle layer active. Selections, Select all float, defloat. Open paper 16 copy and paste as a new layer. Selections invert then hit delete. Delete the Grey Circle Layer. Adjust, Hue/Saturation, Colorize Change Hue to 15 and Saturation to 202. Apply a drop shadow.
Make the White circle layer active. Selections, Select all float, defloat. Open paper 23 copy and paste as a new layer. Selections invert then hit delete. Delete the White Circle Layer. Adjust, Hue/Saturation, Colorize Change Hue to 32 and Saturation to 234. Apply a drop shadow.
Make the Scalloped circle layer active. Selections, Select all float, defloat. Open paper 6 copy and paste as a new layer. Selections invert then hit delete. Delete the Scalloped Circle Layer. Adjust, Hue/Saturation, Colorize Change Hue to 15 and Saturation to 202. Apply a drop shadow.
Make the Square frames layer active. Selections, Select all float, defloat. Open paper 23 copy and paste as a new layer. Selections invert then hit delete. Delete the square frames layer. Adjust, Hue/Saturation, Colorize Change Hue to 32 and Saturation to 234. Apply a drop shadow.
Make the Squares layer active. Selections, Select all float, defloat. Open paper 1 copy and paste as a new layer. Selections invert then hit delete. Delete the squares layer. Adjust, Hue/Saturation, Colorize Change Hue to 15 and Saturation to 202.
Make the Small Circles layer active. Selections, Select all float, defloat. Open paper 23 copy and paste as a new layer. Selections invert then hit delete. Delete the Small Circles layer. Adjust, Hue/Saturation, Colorize Change Hue to 15 and Saturation to 202. Apply a drop shadow.
Open your tube, copy and paste it to your tag. Apply a drop shadow.
Open Palm Tree 2 Resize 65 percent. Copy and paste to your tag. Move below your tube layer. Apply a drop shadow.
Open the coconut image, resize it by 85 percent. Copy and paste it to your tag. Refer to mine for placement. Apply a drop shadow.
Open the Torn Newspaper image. Copy and paste it to your canvas Resize it 105 Percent. Duplicate it and rotate it 90 degrees.
Add any other embellishments that you want.
If you want to resize your tag now is the time to do so.
Add your name and your copyright information.
As Always I would love to see your results. Please make sure that they are copyright compliant so I can add them to my site.
Sunday, June 21, 2009
Naughty Yellow
Tube of choice, I’m using Elias Chatzoudis, you can purchase his work from MPT. Do not use his work if you do not hold a license to do so.
Change the canvas size to 700x700, can resize it smaller later.
Delete the Copyright info
Select the circle layer, Selections, select all, float, defloat
Add a new raster layer. Flood fill with a dark color from your tube. I used #E4AC00.
Selections Select none. Delete the original circle layer.
Duplicate your circle on the original apply a Gaussian blur of 50.
On the duplicated circle apply the Texture Effect Fine Leather using the settings below:
Click on the rectangle 1 layer. Selections select all, float, defloat. Add new raster layer flood fill with Black. Selections select none. Delete the original rectangle. Apply a drop shadow to this layer.
Click on the Naughty word 1 layer , selections select all float defloat. Add new raster layer. Flood fill with a lighter color from your tube. I used #F3DE09 select none, delete the original naughty word 1 layer.
Click on the Naughty word middle layer, selections select all float defloat. Add new raster layer. Flood fill with the same darker color from your tube as above. Select none delete the original naughty word middle layer.
Merge the 2 naughty layers together. Duplicate this layer. On the original, apply toadies what are you X and Y dose set to 20. Apply a drop shadow to the duplicate layer.
If you don’t have eye candy you can apply a white drop shadow then the black one.
Copy and paste your tube. Position it to you liking.
Apply a drop shadow to your tube.
Open the bow that I supplied, colorize to match your tag. Resize 85% copy and paste to your tag. See mine for placement.
If you want to resize your tag now is the time to do so.
Add your name and copyright info.
As always I‘d love to see your results and add them to my slide show.
Saturday, June 20, 2009
Pampered Princes (thanks Jessica!)
My BFF Scrapkit you can purchase it HERE
Mask 181 by weescotslass you can get it HERE
Open Frame 1 resize 85% copy and paste to your blank canvas.
Using your magic wand click inside each of the circles, Selections Modify Expand by 2.
Copy and paste a paper of your choice I used pp07. Selections invert Delete.
Leave selected, copy and paste your close up tube hit delete once.
Lower the opacity of your tube to around 64. Change the blend mode to luminance.
Move both layers under your frame layer.
Open glitter glue blob resize 75% Copy and paste in the upper left corner of your tag, see mine for reference. Move below you frame layer. Duplicate and mirror. Merge your 2 glitter glue blobs together. Duplicate and flip.
Open pp1 copy and paste, move below your frame layer.
Apply Mask.
Apply any other embellishments that you would like.
If you are going to resize your tag now is the time to do so.
Add your name and copyright info.
As always I’d love to see your results
Tuesday, June 16, 2009
Seeing Spots Forum Set
Seeing Spots PTU scrap kit you can purchase it from ScrapsByDMG

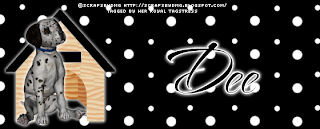
This is a very simple tut for a forum set.
Open a new image 560x225
Open paper 1 copy and paste as new layer to your blank canvas
Open Puppy 2, copy and paste apply the following drop shadow 2 times
V&H 0, Opacity 100, Blur 7, Color White.
Open the doghouse, copy and paste. Add the same drop shadow from above 2 times.
Put your name and copyrights on your tag.
Now for the Avatar.
Open a new image 100x100 Flood fill white.
Copy and paste paper 1
Open the paw line image. Crop out one paw print. Copy and paste as a new layer. Apply the same drop shadow as you did on your tag. Only 1 time.
Type the first letter of your name. Again add the same drop shadow as above 2 times.
As always I'd love to see your results and add them to my results slide show.
Thursday, June 11, 2009
Ruby Royale
Ruby Royale PTU kit by Scraps by DMG
Open Frame 1 colorize to match your tube if needed
Using your magic wand click inside the frame modify expand by 2.
Open one of the papers, I’m using paper 12 colorize if needed. Copy and paste to your tag.
Selections invert delete. Move your paper below your frame.
With your frame still selected copy and paste a larger version of your tube, and hit delete. Make sure your tube is under your below your frame.
Selections select none.
Lower the opacity to 50 and set the blend mode to Luminance (L)
Copy and paste the smaller tube image. See my tag for placement.
Open embellishment4
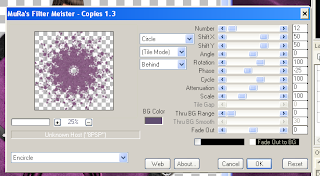
Apply Mura’s Meister Copies using the following settings.(click image to make it larger)
Move this layer below your frame layer.
Apply a drop shadow to the following layers, Frame, smaller tube, embellishment I used V&H-0 Opacity 100, Blur 7
Add any other elements that you would like.
If you want to resize your tag, now is the time to do so.
Add your name and copyright information.
As always I would love to see your results.
Monday, June 8, 2009
Down on the Farm
Down on the Farm Scrap Kit you can purchase it at Scraps by DMG
Open the barn, resize 80% copy and paste to your blank canvas.
Open the Firewood image resize 85% copy and paste to your tag.
Open the cowboy Image Resize 65% copy and paste to your tag.
Open Flowers5 resize 25% copy and paste to your canvas, Duplicate 2 times for 3 total flowers. Position them to your liking. Move flower layer behind the firewood layer.
X out all layers except for the flowers. Merge Visible.
Open the grass image copy and paste to your image duplicate and arrange to your liking. I think I duplicated mine lots of times. Hide all layers except your grass layers and merge visible.
Open tree 2 copy and paste to your tag. Move below your barn layer.
Open paper 10 copy and paste to your tags. Move above the white background layer.
If you want to resize, now is the time to do so.
Add your name and the copyright information.
As always I would love to see your results.
Sunday, June 7, 2009
Frosted Velvet
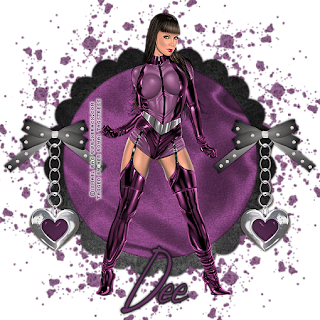
This Tutorial was written for those that have a working knowlege of PSP.
Supplies Needed:
Tube of choice, I’m using one from Ismael Rac, you can get it from his website.
Frosted Velvet Scrap Kit you can purchase it from ScrapsbyDmg
Mura’s Meister Copies Download it from HERE
1. Open new Image 600X600 (you can resize later) Flood fill white.
2. Open Frame 8 from the kit. Resize 65% copy and paste to your blank canvas.
3. Using your magic wand click inside your frame. Selections modify expand 2.
4. Open paper 9 copy and paste. Selections invert delete. Move below your frame layer.
5. Copy and paste your tube as a new layer, resize and place to your liking.
6. Add a drop shadow of H&V 0 Opacity 100 Blur 5 to your frame and tube.
7. Open Charm4 resize 25%. Copy and paste to your tag.
8. Apply the same drop shadow as above. Duplicate – Image – Mirror.
9. Open Bow13 resize 50%. Copy and paste to your tag. See mine for placement. Apply same drop shadow. Duplicate – Image – Mirror.
10. Open glittersplat 3. Paste as a new layer. Move above your white background layer. Resize 50%
11. Apply Mura’s Meister Copies using the following settings.(click image to make it larger)
12. If you want to resize your tag now is the time to do it.
13. Add your name and copyright information.
As always I would love to see your results.
Saturday, June 6, 2009
Template 7
Click the template to download.
Please leave a thank you, it only takes 2 seconds.
Thanks
Thursday, June 4, 2009
Proud American
This Tutorial was written by Amy aka HerRoyalTagstress on June 4, 2009. It's concept is copyrighted to Amy aka HerRoyalTagstress. You may print this tutorial for you own personal use, but please do not copy it in anyway to put online, pass out, rewrite, or claim as your own.This was written using PSP 8 but will work in other versions.

This Tutorial was written for those that have a working knowlege of PSP.
Supplies Needed:
4th July Scrap Kit by Bluedream Designs
Tube of choice, I am using Jessica Dougherty. Do not use unless you have a license from CILM
Mask of choice. I used WSL mask286, but it appears her site is gone
Open a new image 600 X 600 Flood fill white
Open Frame 1. Copy and paste as a new layer to your blank canvas. Resize 85%.
Open paper 7. Click inside your frame. Selections modify expand 2. Copy and paste you paper as a new layer. Invert, Delete, Selections None. Move your paper below your frame.
Select the inside of the frame again copy and paste your tube, Selections, Invert. Grab your eraser tool and erase the parts of the tube that hang over the frame. Selections Select none.
Add a drop shadow to your tube and the frame.
Add any elements that you would like to your tag.
Open paper 2 copy and paste as a new layer. Move above your white background.
Apply your mask.
Merge Group.
Resize tag if desired
Add your name and Copyright information.
I hope you enjoyed the tut
I would love to see your results.
Camo Girl
Yvette’s Template 72 – You can get it HERE
Vix Mask #147 You can get it HERE Click on goodies then masks
Open Yvette’s Template 72. Duplicate it and close the original. Delete the © layer
Click on the layer Rectangles. Selections – select all – float – defloat.
Open paper #3 copy and paste as new layer. Selections invert delete. Selections Select none.
Delete the original Rectangle layer
Click on the Circle layer. Selections – select all – float – defloat
Open Paper #4 copy and paste as new layer. Selections invert delete. Selections Select none.
Delete the original circle layer
Click on the Shape layer. Selections – select all – float – defloat.
Open Paper#1 Copy and paste as a new layer. Selections invert delete. Selections Select none.
Delete the original shape layer.
Click on the Dotted Circle layer. Selections – select all – float – defloat
Copy and paste Paper #1 as a new layer. Selections invert delete. Selections Select none.
Delete the original dotted circle layer.
Open your tube of choice. On your new shape layer, Selections – select all – float – defloat. Copy and paste your tube. Selections, Invert.
Grab your eraser tube and erase the parts that hang over the shape layer. Selections, select none.
Apply the following drop shadow to all your layers except the dotted circle.
V and H 0
Opacity 100
Blur 7
Add any elements that you would like.
Open Vix Mask 147
Add a new layer. Place it above your background layer. Copy and paste Paper#4.
Layers, new mask layer, from image.
Select Vix Mask 147.
Merge Group.
Resize mask layer 112.
Add your name and copyright information.
I hope you have enjoyed this tutorial. I would love to see your results. You can email them to me.
Wednesday, June 3, 2009
Monday, May 25, 2009
MIA
Monday, April 27, 2009
First Desktop
Thursday, April 2, 2009
Hopeful Green
This Tutorial was written by Amy aka HerRoyalTagstress on April 2, 2009. It's concept is copyrighted to Amy aka HerRoyalTagstress. You may print this tutorial for you own personal use, but please do not copy it in anyway to put online, pass out, rewrite, or claim as your own.
This was written using PSP 8 but will work in other versions.
For this tutorial you will need:
Scrap kit- Green Hopeful from Scraps Dimensions
Tube I used a Zindy Tube. You have to have a license to use the tube I'm using but she has several free tubes on her site HERE
Mask- WSL_Mask 245 from Weescotslass
Okay lets get started.
Open a new image 650X650, you can re-size later. Flood fill with white.
From the kit open the Frame, copy and paste it to your canvas.
Use your magic wand to click inside one of the frames boxes.
Selections, modify, expand 5. Copy and paste your tube, position to your liking. Selections, invert, delete, select none.
Do the same for the other 2 boxes.
Add a drop shadow to your frame. I used V&H 0, opacity 100, blur 5.
From the kit open a paper of choice. I used paper 7. Copy and paste it to your canvas. Move it below your fame layer but above your white layer. I re-sized it 115 percent so it filled my whole canvas.
Open WSL_Mask45. Layers, new mask layer, From image. Make sure you set it to WSL_Mask45. Source Luminance checked. Click OK
Merge Group.
Re-size if you like.
Add your copyright information and your name.
All done!
I would love to see your results. You can email them to me.
Sunday, March 29, 2009
Desktop Calendars
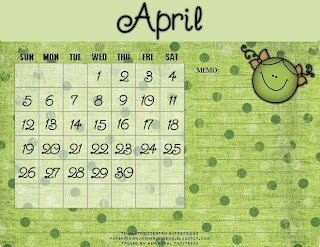
Thought maybe someone would be able to use them
They are 595X595 Pixels
Click on the images to download.
Please take a minute to say Thank You.
Tuesday, March 10, 2009
Template #6 and a Snag
Download the Template HERE
Download the Snag HERE

Layouts
It's too much trouble to post them in 2 places LOL. So If you would like to use my skins come by the group.
Huggers
Thursday, March 5, 2009
Wednesday, March 4, 2009
Yuku Skins
Tuesday, March 3, 2009
Template #5
If you download please leave a comment, it only takes a second.
Download HERE
Still Playing
Huggers


